Use Footnotes and Endnotes in your document to include comments or provide sources for information.
Footnotes typically appear at the bottom of the page in which they are inserted, although they can be placed below text anywhere on the page.
Endnotes will be listed either at the end of the section or at the end of the document, depending on your settings.
Adding Footnotes
- Click in the text where you want the footnote added.
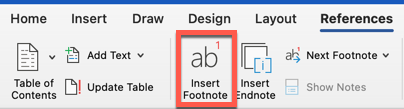
- From the References tab at the top of the document, select Insert Footnote
- A reference mark will be inserted as a superscript number in the text, and your cursor will be placed at the bottom of the page, where you can add the footnote text.
Tip: Double-click the footnote mark to return to your place in your document.
Adding Endnotes
- Click in the text where you want the endnote added.
- From the References tab at the top of the document, select Insert Endnote.

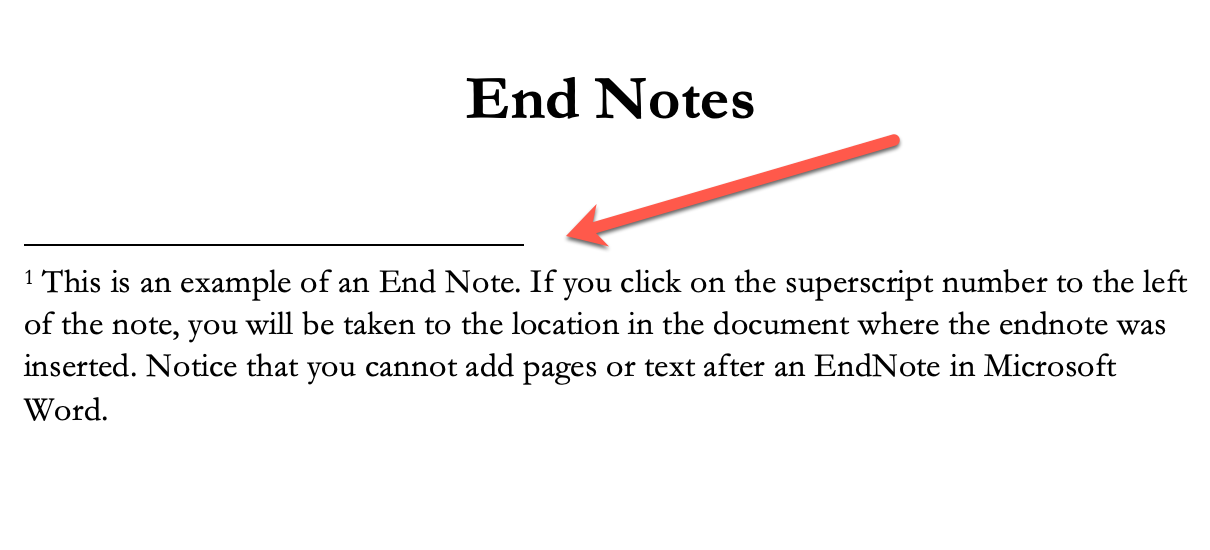
- A reference mark will be inserted as a superscript number in the text, and your cursor will be placed at the end of the document, where you can add the endnote text.
IMPORTANT: Microsoft Word does not allow any text or pages to be inserted after End Notes. They are designed to be at the end of the book.
Tip: Double-click the endnote mark to return to your place in your document.
Customizing Footnotes and Endnotes
After adding your footnotes and endnotes, you can change the number format or where they show up in your document.
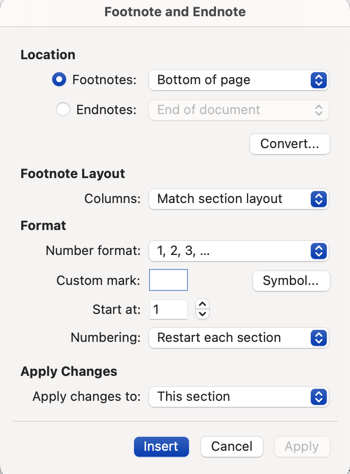
On the Insert menu, click Footnote to open the Footnote and Endnote dialog box shown below.
TIP: Use this dialog box to Insert or Modify footnotes and endnotes
| Footnote | Endnote | |
| Location | Bottom of Page Below Text |
End of Section End of Document |
| Footnote Layout | Match Section Layout 1 Column 2 Columns 3 Columns 4 Columns |
N/A |
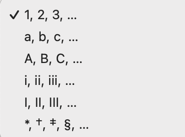
Footnotes and Endnotes can be numbered as:
You can also enter the starting number and choose one of the following options for numbering:
- Continuous
- Restart each section
- Restart each page
Apply the changes to either the whole document or a specific section.
Removing or Changing the Endnote Separator
Word will include a separator before the first endnote as well as the first endnote on any subsequent pages.
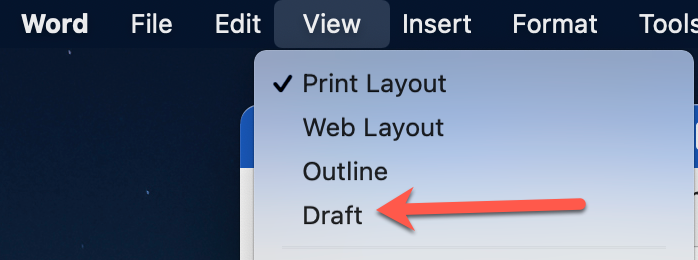
To change or remove the endnote, go to View > Draft
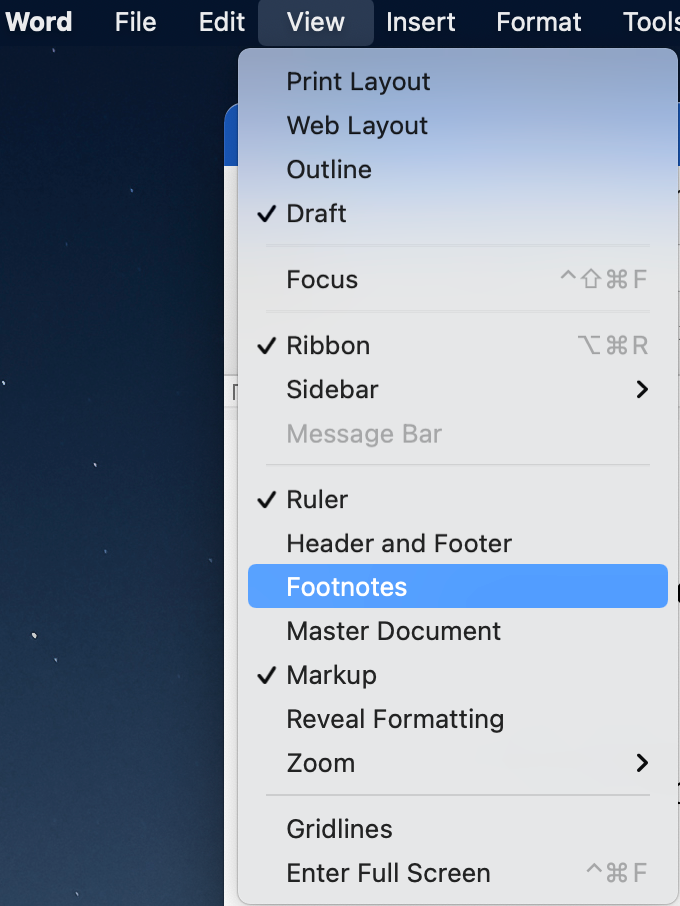
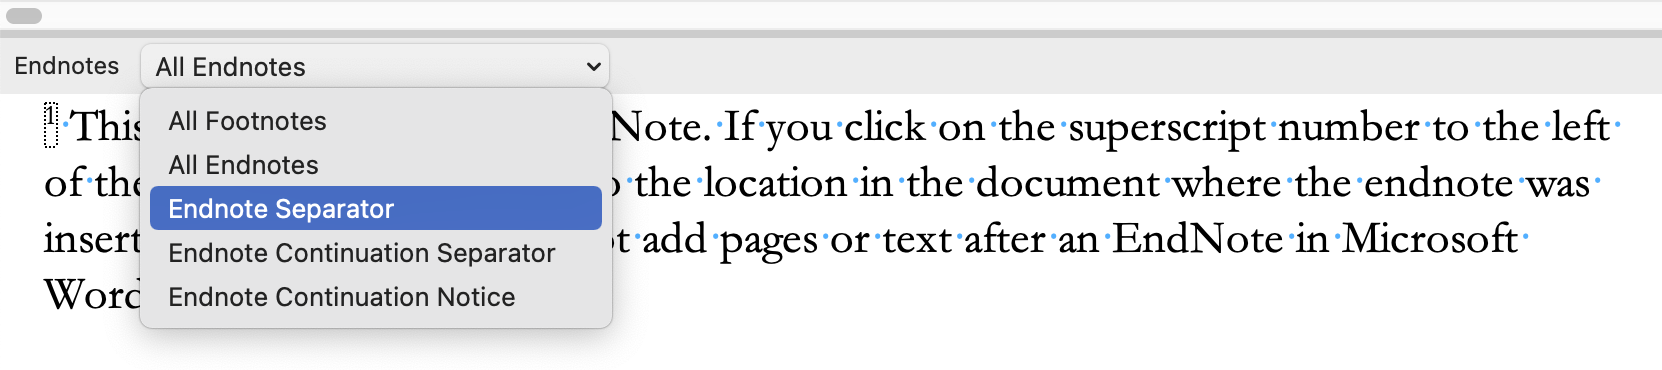
Once you are in Draft mode, choose View > Footnotes
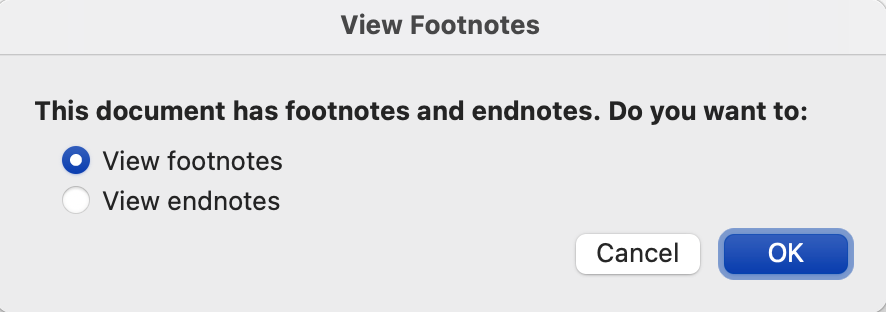
View footnotes is the default. Toggle to “view endnotes” and click OK.
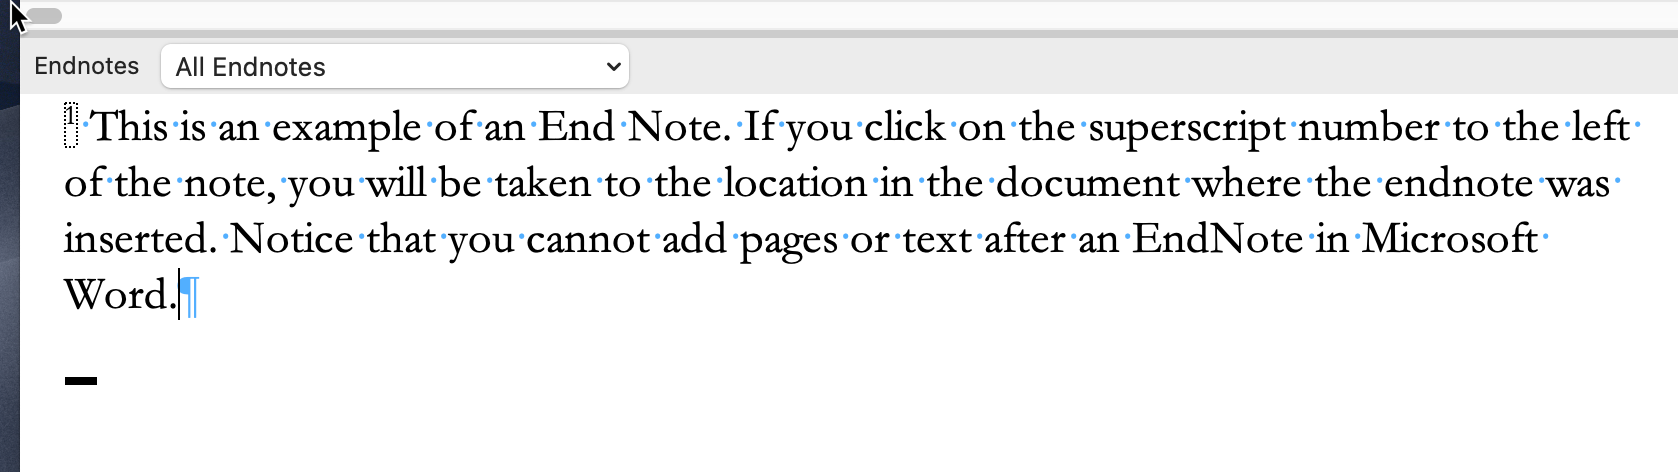
At the bottom of the screen, you will see a list of all the endnotes in the document. This example only has one endnote.
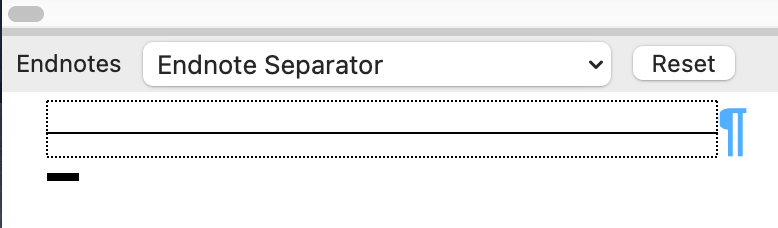
From the dropdown list, select “Endnote Separator.”
Remove the line or change the separator.
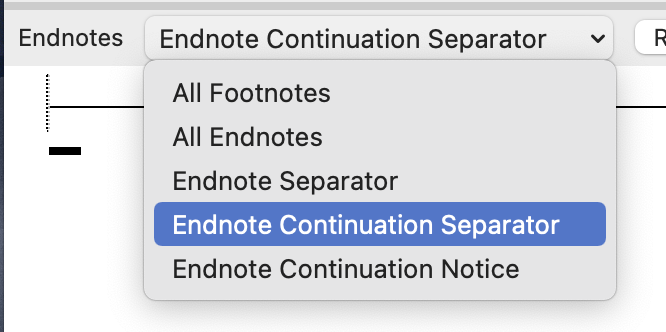
To change the separator on subsequent pages, choose “Endnote Continuation Separator” from the dropdown list.

The continuation separator line is longer than the initial separator line. Change or remove this line.
Return to print layout using the View > Print Layout option from the main menu.